October 12, 2026
How to Photograph a White Cat Without Losing Fur Detail
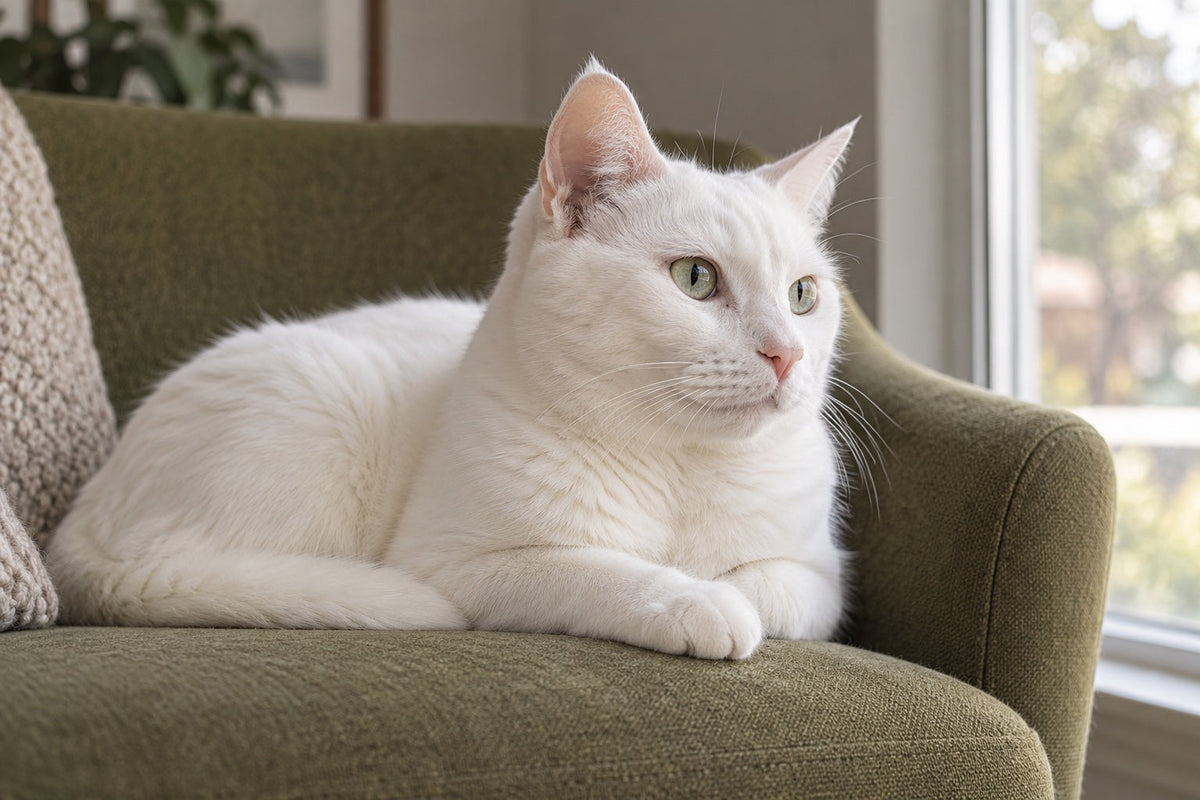
Look at the fur before the brightness slider
If you're learning how to photograph a white cat, inspect the first picture before changing exposure. A grey-looking coat and an empty white patch need different fixes. More exposure can help the first; it can make the second worse.
Look at the cheek nearest the light. Can you see the direction of the hairs and the curve above the whisker pad? Then look below the chin. A white coat still has shadows, folds and changes in tone. For a portrait reference, those small differences explain the shape of the cat's face.
This is a narrow part of choosing useful photographs. Our pet portrait reference photo guide covers the wider set of views an artist may need.
Grey fur and blank white patches need different fixes
Take one ordinary photograph before making adjustments. Open the saved picture and enlarge the face. Judge the coat itself rather than the overall lightness of the room, which might contain a dark sofa or a bright window.
If the coat looks grey but you can still see the hairs, try a slightly brighter exposure for the next picture. Stop before the cheek or forehead loses texture. A shaded part of the coat can remain grey; making every part equally white removes the shadows that describe a rounded face.
If the forehead or chest is a flat, bright patch, try a darker exposure. Check whether the missing texture appears in the new photograph. If the eyes become too dark while the bright patch remains, change the light rather than continuing to darken the whole scene.
A histogram, where your camera or editor provides one, can help with this check. Adobe's histogram guide places bright tones at the right and explains that clipping at the edge can mean lost detail. A bright window can contribute to that edge too, so inspect the cat's fur before deciding what to change.
A white subject naturally puts more information towards the bright end. Do not aim for a graph centred in the middle. The useful question is whether the cheek, nose and ear edges still have shape.

Change the light when the face has two extremes
A stripe of direct sunlight across the forehead can leave you choosing between a blank forehead and a dark lower face. Wait until that stripe moves, or try a familiar resting place lit more evenly by daylight. You can change your own position without picking up or holding the cat.
Leave enough difference between the coat and its surroundings to follow the outline. White cat photography does not require a black studio backdrop. A plain mid-toned chair or wall may make the ears easier to see without turning the background into another exposure problem.
Nikon's cat photography guidance discusses separating a white cat from a light background. For a simple home reference, start by checking what is already behind the cat. Move yourself until the head falls against a less similar tone, while keeping the face lit.
Cats Protection recommends soft light, a contrasting background and switching off phone flash, which could startle the cat. Keep the route away clear. If the cat leaves, finish the attempt rather than trying to hold the pose.
Make one small exposure change at a time
On an iPhone, Apple's camera instructions explain how to tap the screen to move the focus area, then drag the exposure control beside it up or down. Touching and holding the focus area locks focus and exposure until you unlock them. Other phones use different controls; look for the instructions for your own camera app.
Focus on the nearer eye, make a small adjustment in the direction your first photograph suggests, then take another frame. Compare the two saved pictures at the same enlargement. Look for a clear eye and visible fur around it. A brighter preview alone does not tell you whether the photograph is more useful.
Keep the framing similar while you compare exposures. If you move from a face close-up to a wide view of a dark room, automatic metering may change again. There is no single exposure-compensation number that fits every white cat and every background.
If the cat turns or walks away while focus is locked, unlock it and refocus when they settle.
A yellow or blue coat is a separate problem
When photographing white fur under mixed lighting, check whether warm and cool areas follow the light rather than the coat. A pale coat under a warm lamp can look different from the same coat beside a window. Start with one main source of light where possible, rather than trying to judge the fur under daylight and a strong coloured lamp together.
Compare the photograph with the cat in that light. If your cat has genuine cream areas, keep them. Avoid whitening the whole coat simply because the cat is usually described as white. Likewise, the skin showing through an ear and a faint mark beside the nose need not match the colour of the chest.
For a reference set, choose the picture whose colour you recognise and label it accordingly. The cat coat-marking guide explains how to describe small boundaries and asymmetries. Write down what you can actually see rather than guessing what a bright patch might hide.
Keep the version that explains the cat
Save the original file before making an edit. If you adjust brightness or colour, keep the edited copy separately and compare it with the original. You can send both to a portrait maker with a short note explaining which one is closer to the coat you know.
A favourite picture can still belong in the set even if its brightest fur has little detail. Label it for expression or pose, then add a clearer supporting image for the missing area. Editing cannot be relied on to recover fur detail that was never recorded.
Our guide to organising pet photos covers keeping originals and project selections apart. Give the chosen files useful names, such as “face in daylight” or “left ear detail”, and keep your notes with them.
If two images disagree about colour, identify the one you trust before sending the folder.